Friday, January 14, 2011

Enough Tags Already!

Last ones – for 2010 anyway.

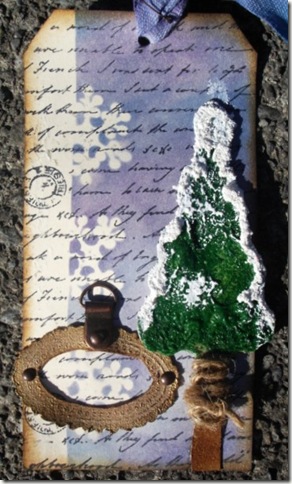
Day 11

Christmas Tag 003

Pretty happy with this one too.  I created another mask for the snowflake border and cut the tree on the silhouette.

I smothered the tree in pva glue and green embossing powder.  When heated, the glue bubbles and this creates an amazing texture, setting like enamel.  Rock Hard!  The snow was added using some textural “stuff” I got from goodness know where.

The frame is made from a stamp, clear embossed on grunge paper and inked.

Day 12

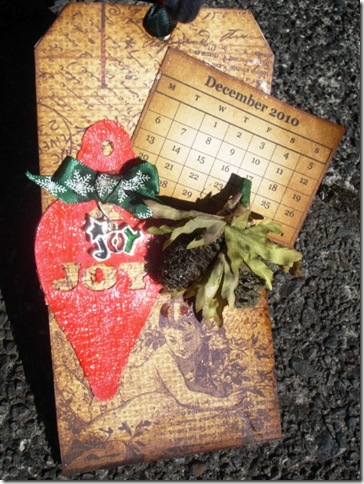
Christmas Tag 005

For the background, I used a digital paper that I have had for ages. The calendar page is a digital graphic.  I don’t have any of the Movers and Shapers die so I cut my ornament on the silhouette.  The Joy Charm is actually one of those silly earrings that people feel compelled to wear at Christmas but put to much better use here, lol.  The pinecones are from a spray of artificial flowers bought at a dollar store about 2 years ago.

So – there you have it.  All 12 tags for 2010.  Roll on December 2011!
But Wait! There’s More!

Day 9

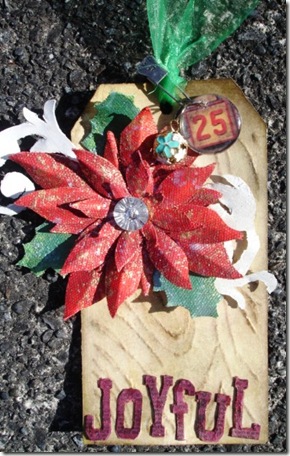
Christmas Tag 001

One of my favourite tags.  The rosette and the lettering cut on the silhouette. The rosette was inked and stamped before folding. The buttons and the baubles are from my stash. (Gotta love cheap jewellery that you would much rather take apart than wear)

Day 10

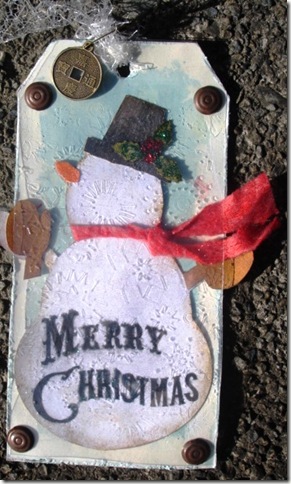
Christmas Tag 002

Once again I was faced with the challenge of not having the Tim Holtz die for the snowman.  Yes – you guessed it – back to the silhouette!  I embossed some acetate in the cuttlebug and secured it with brads from my stash. (Hmm – must fix that hand up)

Thursday, January 13, 2011

Moving Right Along

Day 7

December 052

My Word! Was this a challenge or what? A woodgrain embossing folder – do I have one of those? Nah-Uh!

The silhouette came to the rescue yet again! (how did I live without one of these amazing machines?)  I used a purchased woodgrain background file and sized it to fit the tag.  I then attacked said tag with the embossing stylus once again.  Inking on the raised side showed up the pattern and I was pretty stocked with myself.

The flourish, the poinsettia and the wording were all cut on the silhouette – of course, lol.  I didn’t have a type charm (but I do now, haha) so I used and epoxy sticker from my stash.

Day 8

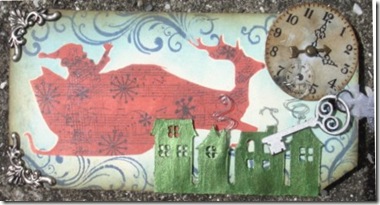
December 049

OK – not so thrilled with this one but had fun creating the houses on the silhouette as well as the Santa/Sleigh that I cut from acetate to use as a stencil/mask.  The clock face is a digital graphic and I added a Ideology spinner.  The key is silver-inked chipboard.

Now . . . Where was I ?

Oh, yes – Christmas Tags days 5 and 6

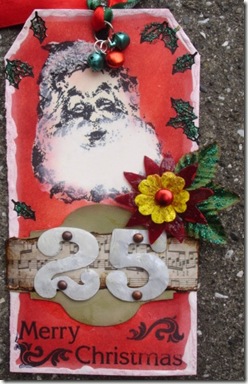
Day 5

 December 048

I printed the Santa on the tag, used peel-craft type stickers for the holly leaves (I went over gold with a black permanent marker) and used the Silhouette to cut the label shape and the numbers.

I managed to make the numbers look like enamelled metal by using an embossing stylus on the reverse, painting them with white and topping off with clear dimensional.

I added the clear dimensional to a paper flower which soaked right in and gave it an almost glass-like look.

Overall, I’m pretty happy with this one.

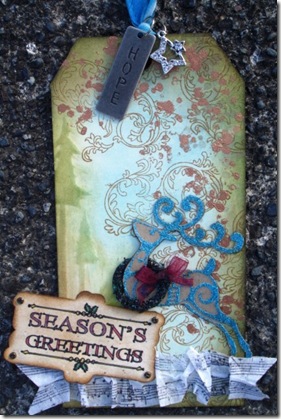
Day 6

December 051

I used the silhouette to sketch and cut the Season Greetings tag and coloured it with metallic gel pens, edging it with Vintage Photo Distress Ink.

I also cut several “layers” of trees that I glued together in order to do the embossing on the left hand side (not that you can really see it.

The swirls were stamped in gold and the “splatters” in bronze paint.  The reindeer is a clear sticker on brown cardstock.  The wreath was made with white flowersoft that I coloured with re-inker and  topped with clear dimensional.

I don’t have Tim’s tissue tape so I made my own by stamping on white tissue paper and backing it with double sided tape.  Works for me! LOL